Confirm login ID
STEP1 : Identity verification
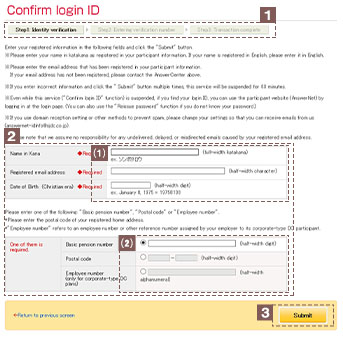
This section indicates which step you are currently at in the login ID confirmation process.
(1)Name in Kana, Registered email address, Date of Birth
(Christian era)
Please enter your name in katakana and email address as
registered in the AnswerNet participant information. Please
enter your date of birth in Christian era.
(2)Basic pension number、Postal code、Employee number(only for
corporate-type DC plans)
Please press the radio button ◎ to enter one of the
following:Basic pension number, Postal code or Employee
number (only for corporate-type DC plans).
Confirm the details you have entered, then click the “Submit”
button.
The screen will move to "STEP2" and an email
containing
a"verification number" will be sent to your
registered email
address.
Please do not close the "STEP2" screen displayed and check
the email.
STEP2 : Entering verification number
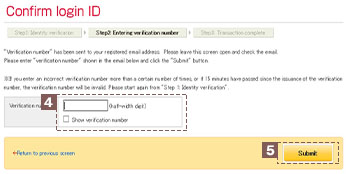
Please enter the "verification number" shown in the
email.
The verification number will be shown on the screen by
checking the " Show verification number" check
box.
Please check the verification number and click the
"Submit" button.
An email containing your "login ID" will be sent
to your registered email address.
STEP3 : Transaction complete
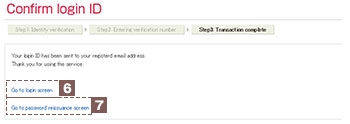
If you know your registered password, click "Go to login screen" to move to the "login screen of the participant website" and log in.
If you do not know your registered password, click "Go to password reissuance screen" to move to the "password reissuance screen". Please log in after obtaining a password.